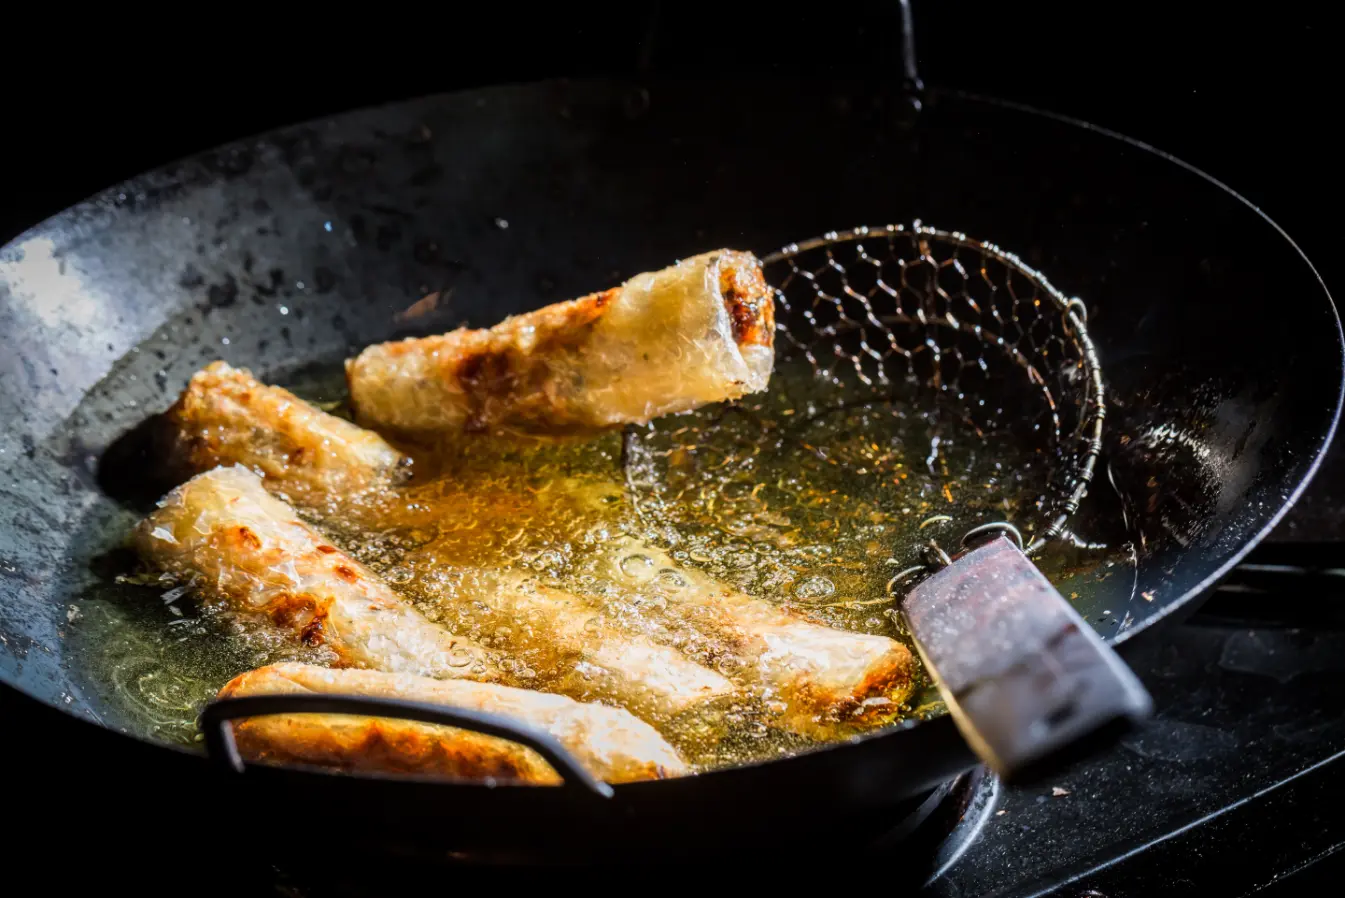
Are you tired of soggy, greasy food when trying to fry at home? Shallow frying can be tricky, but it’s a great way to achieve that crispy, golden-brown exterior without the hassle of deep frying.
Many struggle with getting the right oil temperature and avoiding overcrowding the pan.
Did you know that shallow frying captures the flavors of deep-fried foods without the mess? Our guide on “Mastering Shallow Frying: Expert Tips And Tricks For Perfect Results” will help you perfect this technique.
We’ll cover everything from choosing the right pan to managing oil temperature. Get ready to elevate your culinary skills with our shallow frying tips and tricks.
Key Takeaways
- Shallow frying creates crispy exteriors and juicy interiors for foods like chicken, fish, and vegetables without the mess of deep frying.
- Use a heavy-bottomed skillet or sauté pan and heat oil to 350-375°F for best results. Monitor temperature with a thermometer.
- Cook in small batches to maintain oil temperature. Leave space between food items for even cooking and browning.
- Pat ingredients dry before frying (when necessary) to prevent splattering and achieve crispier results. Drain fried foods on a wire rack or paper towels.
- Common mistakes include using too much or too little oil, overcrowding the pan, and not maintaining the proper oil temperature throughout cooking.
Understanding Shallow Frying
Shallow frying is a versatile cooking method that offers the perfect balance between deep-frying and pan-searing. It’s a great way to achieve crispy exteriors and juicy interiors for a wide range of foods, from chicken cutlets to vegetable fritters.Advantages of Shallow Frying
Shallow frying offers a delightful middle ground between deep-frying and pan-searing. This technique captures the flavors of deep-fried foods without the mess, making it perfect for cooking at home.
It’s a great way for beginners to practice frying with larger quantities of oil while still maintaining control over the cooking process.
Many chefs love shallow frying for its versatility and efficiency. The method works wonders for vegetables, chicken breast, and fish, creating a crispy exterior while keeping the inside moist.
In my experience, shallow-fried foods often have a more balanced texture compared to their deep-fried counterparts. Let’s explore the essential tools and equipment needed for mastering this technique.
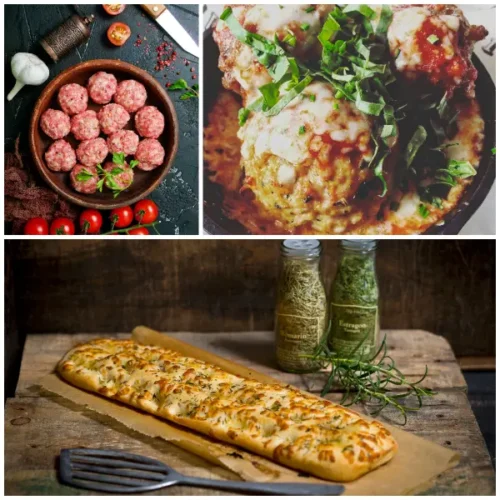
Variety of Foods Suitable for Shallow Frying
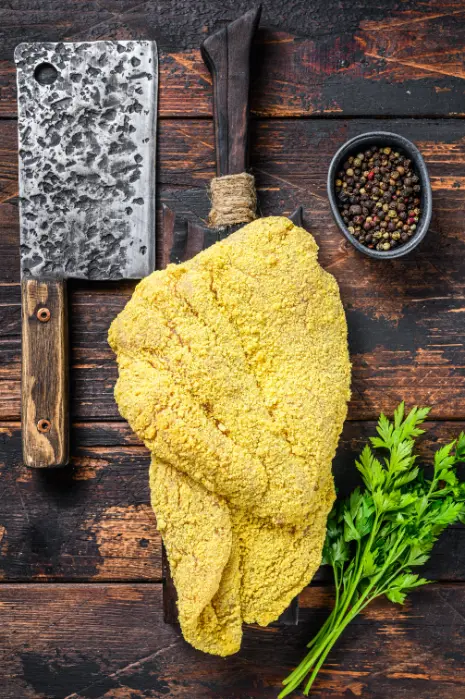
Shallow frying is a versatile cooking method that works well for a wide range of foods. Chicken breast, fish fillets, and vegetables are prime candidates for this technique. These foods benefit from the crispy exterior and moist interior that shallow frying provides.
I recommend using premium breading or batter mixes to enhance flavor and texture.
Panfrying is ideal for thin cuts of meat, like pork chops or chicken cutlets. It’s also great for potato pancakes, fritters, and croquettes. The key to success lies in maintaining the right oil temperature and avoiding overcrowding the pan.
This cooking method captures the delicious flavors of deep-fried foods without the mess, making it a perfect way to elevate your culinary skills.
Mastering the Technique of Shallow Frying
Mastering shallow frying can elevate your cooking game. Learn the tricks to achieve crispy, golden results every time.
Selecting the Appropriate Pan

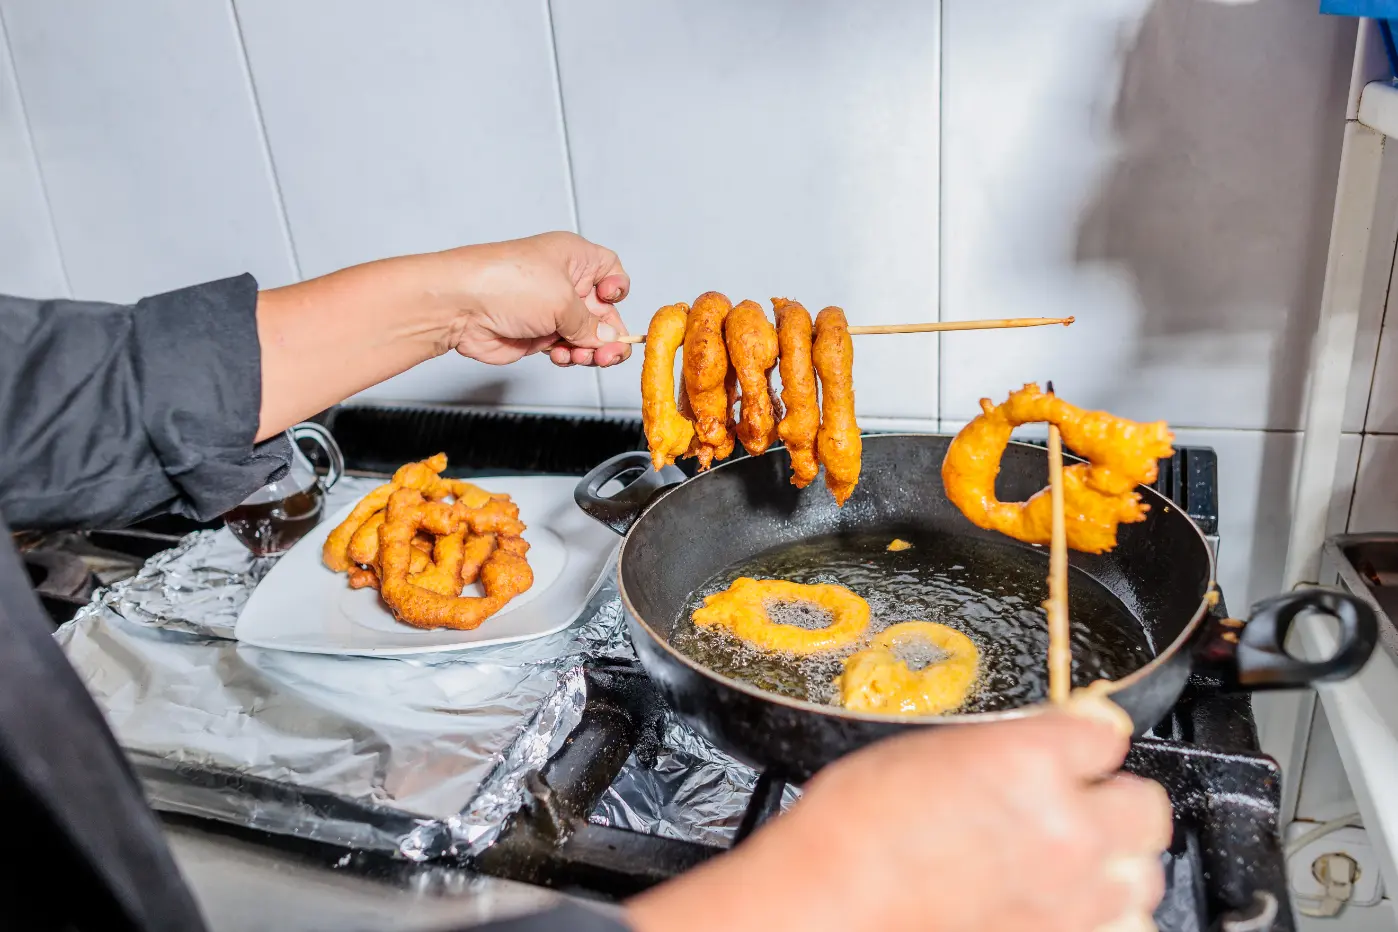
Selecting the right pan is crucial for shallow frying success. A heavy-bottomed skillet or sauté pan with straight sides works best, distributing heat evenly and preventing hot spots.
Cast iron or stainless steel pans are ideal choices, offering excellent heat retention and durability. The pan should be large enough to accommodate your food without overcrowding, allowing for proper oil circulation and even cooking.
The right pan can make or break your shallow frying experience. – Chef Maria Thompson
Expert tip: Choose a pan with a light-colored interior to easily monitor food browning and oil temperature. This feature helps achieve that perfect golden-brown crust on your shallow-fried dishes.
Next, let’s explore how to determine the correct oil temperature for optimal results.
Determining the Correct Oil Temperature

Determining the correct oil temperature is crucial for mastering shallow frying. Expert chefs recommend heating the oil until it sizzles when food is added. This typically occurs between 350°F and 375°F (175°C to 190°C).
Using an oil with a high smoke point, like vegetable or canola oil, helps prevent overheating and ensures perfect results.
Maintaining the ideal temperature throughout cooking is key. A digital thermometer can help monitor oil heat accurately. If the oil is too cool, food absorbs excess grease. Too hot, and it burns quickly.
Proper temperature control leads to crispy, golden-brown exteriors and juicy interiors. Next, we’ll explore techniques for even cooking in shallow frying.
Managing Cooking Batches for Optimal Results
After determining the correct oil temperature, managing cooking batches is crucial for optimal results in shallow frying. Proper batch management ensures even cooking and maintains oil temperature consistency. Here’s how to manage cooking batches effectively:
- Cook in small batches: Avoid overcrowding the pan to prevent oil temperature drops. This technique allows each piece to cook evenly and achieve the desired crispiness.
- Maintain oil temperature: Monitor the oil temperature between batches. Allow the oil to reheat to the correct temperature before adding the next batch.
- Use a slotted spoon or spider: Remove cooked food quickly and efficiently with these tools. This method helps maintain oil temperature and prevents overcooked food.
- Prepare food in advance: Cut ingredients to similar sizes for even cooking. Uniform pieces cook at the same rate, ensuring consistent results across batches.
- Adjust heat as needed: Increase or decrease heat to maintain the ideal frying temperature. This step prevents undercooked or burnt food due to temperature fluctuations.
- Allow oil to recover: Give the oil time to return to the correct temperature between batches. This pause ensures each batch starts cooking at the optimal temperature.
- Use a thermometer: Regularly check oil temperature with a thermometer. This tool helps maintain consistency throughout the cooking process.
- Rotate food while cooking: Turn food pieces halfway through cooking for even browning. This technique ensures all sides are cooked to perfection.
- Drain excess oil: Place cooked food on paper towels or a wire rack. This step removes excess oil, enhancing crispiness and reducing greasiness.
- Clean oil between batches: Remove any debris from the oil using a fine-mesh strainer. This practice prevents burnt flavors from transferring to subsequent batches.
Tips for Draining Oil to Enhance Crispiness
Properly draining oil is crucial for achieving crispy, golden-brown results in shallow frying. Here are some expert tips to enhance crispiness and reduce excess oil in your fried dishes:
- Use a wire cooling rack: Place fried foods on a wire rack set over a baking sheet. This allows air to circulate, preventing soggy bottoms and maintaining crispiness.
- Employ paper towels strategically: Line a plate with paper towels and place fried items on top. The paper absorbs excess oil without trapping moisture.
- Shake off excess oil: Gently shake each piece of food as you remove it from the pan. This action helps remove surface oil before placing it on the draining surface.
- Blot with care: For delicate items, lightly blot the surface with a clean paper towel to remove excess oil without disturbing the crispy coating.
- Drain at an angle: Hold fried foods at a slight angle for a few seconds before placing them on the draining surface. This allows oil to run off more effectively.
- Utilize a slotted spoon or spider: These tools allow oil to drain back into the pan while removing food, reducing overall oil absorption.
- Consider salt timing: Salt fried foods immediately after draining to enhance flavor without compromising crispiness. The salt draws out any remaining moisture.
- Implement double-draining: For extra-crispy results, drain foods twice – first on paper towels, then transfer to a wire rack for final cooling.
Mastering these draining techniques ensures your shallow-fried dishes remain crispy and appetizing. Let’s explore common pitfalls in shallow frying and how to avoid them.
Common Pitfalls in Shallow Frying
Shallow frying can be tricky. Here are some common mistakes to watch out for:.
Errors in Oil Volume
Measuring oil accurately is crucial for successful shallow frying. Too little oil can lead to uneven cooking and sticking, while too much increases the risk of splattering and burns.
I would recommend using just enough oil to cover about 1/3 of the food’s thickness. This ensures optimal heat distribution and crispy results.
One common mistake is estimating the oil amount by eye. Instead, use a thermometer to measure oil temperature and a measuring cup for precise volume. High-quality oils with higher smoke points, like avocado or peanut oil, perform better in shallow frying.
They maintain stability at higher temperatures, resulting in crispier, less greasy food. Proper oil volume is essential to mastering the art of shallow frying.
Importance of Drying Food Before Frying
Maintaining the ideal oil temperature leads us to another crucial step in shallow frying: drying food before it hits the pan. Moisture is the enemy of crispy, golden results. Excess water on food surfaces causes oil to splatter and can lead to uneven cooking.
Pat ingredients dry with paper towels before frying. This simple step improves food safety and texture. Dry surfaces allow breading to adhere better and create that satisfying crunch we crave.
From my experience teaching cooking classes, students are often surprised by how much this small action elevates their shallow frying game. Quality matters here – premium breadings stick better to dry foods, resulting in perfectly crisp exteriors.
Shallow Frying Recipes and Tools
Shallow Frying Recipes and Tools offer a gateway to mastering this cooking technique. Discover how to create crispy, golden delights with the right equipment and recipes. Keep reading to uncover expert secrets for perfect shallow frying results!
Step-by-Step Cooking Guide

Mastering shallow frying requires a systematic approach to achieve perfect results. Here’s a step-by-step guide to help you become an expert in this cooking technique:
- Choose the right pan: Select a heavy-bottomed skillet or frying pan with sloped sides for easy flipping.
- Pick your oil wisely: Opt for oils with high smoke points like vegetable, canola, or peanut oil.
- Prepare your food: Pat ingredients dry to prevent splattering and ensure crispy results.
- Heat the oil: Pour about 1/4 to 1/2 inch of oil into the pan and heat to 350-375°F (175-190°C).
- Test oil temperature: Drop a small piece of bread into the oil; it should sizzle immediately and turn golden in about 60 seconds.
- Add food carefully: Gently place ingredients into the hot oil, avoiding overcrowding.
- Maintain oil temperature: Monitor and adjust heat as needed to keep oil at the ideal frying temperature.
- Cook in batches: Fry in small batches to prevent oil temperature from dropping too much.
- Flip once: Allow food to cook on one side until golden brown before flipping.
- Drain excess oil: Remove cooked food with a slotted spoon and place on paper towels to absorb excess oil.
- Season immediately: Sprinkle salt or other seasonings on food while it’s still hot for better flavor absorption.
- Serve promptly: Enjoy your perfectly shallow-fried creations while they’re hot and crispy.
Recommended Tools and Equipment
Having the right tools and equipment is crucial for successful shallow frying. Here’s a list of recommended items to elevate your culinary skills and achieve perfect results:
- Heavy-bottomed skillet or frying pan: A high-quality pan distributes heat evenly, preventing hot spots and ensuring consistent cooking.
- Thermometer: An accurate thermometer helps maintain the ideal oil temperature, typically between 350°F and 375°F for optimal frying.
- Spider skimmer or slotted spoon: These tools allow easy removal of fried foods while draining excess oil, enhancing crispiness.
- Tongs: Long-handled tongs provide safe handling of food during frying, minimizing the risk of burns.
- Paper towels or wire rack: Proper draining is essential for crispy results. Use paper towels or a wire rack to remove excess oil after frying.
- Oil with high smoke point: Choose oils like vegetable, canola, or peanut oil that can withstand high temperatures without burning.
- Breading station: Set up separate dishes for flour, beaten eggs, and breadcrumbs to create a crispy coating on your food.
- Splatter screen: This handy tool reduces oil splatters, keeping your stovetop clean and preventing burns.
- Kitchen timer: Precise timing ensures perfectly cooked food without overcooking or burning.
- Fire extinguisher: Safety first! Keep a kitchen-rated fire extinguisher nearby in case of emergencies.
Now that we’ve covered the essential tools, let’s explore some common pitfalls to avoid in shallow frying.
Suggested Recipes for Shallow Frying
Shallow frying opens up a world of delicious possibilities in your kitchen. Here are some mouthwatering recipes perfect for mastering this cooking technique:
- Crispy Chicken Cutlets: Coat thin chicken breasts in seasoned flour, egg wash, and breadcrumbs. Shallow fry in hot oil until golden brown and cooked through.
- Pan-Fried Fish Fillets: Dredge white fish fillets in flour and shallow fry until crispy on the outside and flaky on the inside.
- Vegetable Fritters: Mix grated vegetables with flour, eggs, and spices. Drop spoonfuls into hot oil and fry until crispy and golden.
- Potato Pancakes: Grate potatoes, mix with onions and eggs, and shallow fry until crispy on both sides.
- Eggplant Parmesan: Coat eggplant slices in breadcrumbs and shallow fry until golden. Layer with tomato sauce and cheese, then bake.
- Breaded Pork Chops: Coat pork chops in seasoned breadcrumbs and shallow fry until golden brown and cooked through.
- Crispy Tofu Squares: Press firm tofu, cut into cubes, coat in cornstarch, and shallow fry until crispy on all sides.
- Zucchini Cakes: Mix shredded zucchini with flour, eggs, and herbs. Form into patties and shallow fry until golden and crispy.
Conclusion
Mastering shallow frying enhances your culinary skills significantly. With practice and these expert tips, you’ll create perfectly crispy, flavorful dishes every time. Selecting the right pan, managing oil temperature, and avoiding common pitfalls are key for optimal results.
Experiment with different recipes to expand your repertoire and impress family and friends. Your path to becoming a shallow frying expert begins now – start cooking and enjoy the delicious results!
FAQs
1. What is shallow frying?
Shallow frying is cooking food in a small amount of hot oil. The oil only covers part of the food. This method is faster than deep frying.
2. How do I choose the right pan for shallow frying?
Pick a heavy-bottomed pan. It should be wide and shallow. This type of pan heats evenly. It also prevents hot spots that can burn food.
3. What’s the ideal oil temperature for shallow frying?
The best temperature is between 350°F and 375°F. Use a thermometer to check. This range ensures crispy exteriors and fully cooked interiors.
4. How can I prevent oil splatters when shallow frying?
Pat food dry before frying. Add it to the oil gently. Don’t overcrowd the pan. Use a splatter screen. These steps reduce dangerous oil splashes.